.jpg)

The registration form of any eCommerce site is an important feature that is utilized to collect consumer data.
You may arrange and classify your registered clients based on your needs and requirements using the obtained data.
So, in today’s article, we will show you how to add custom fields to the WooCommerce Registration Form.
Follow these steps to get custom fields
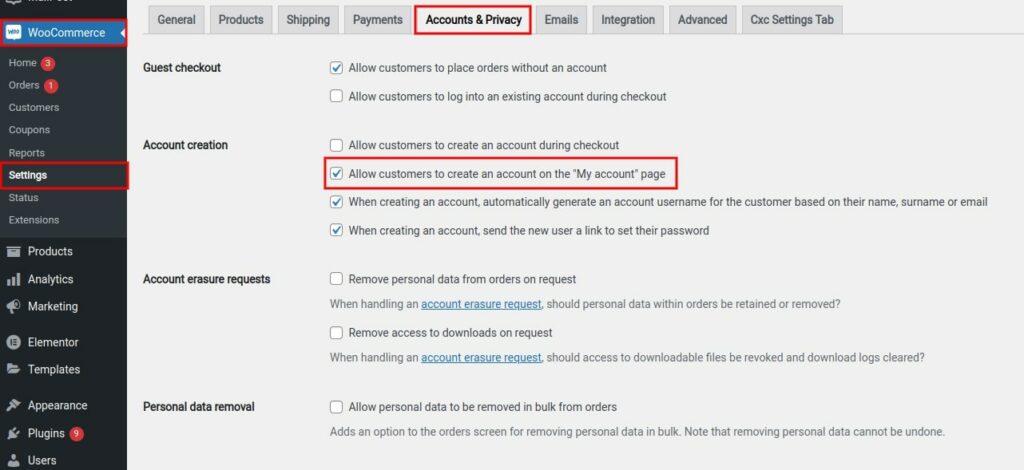
Step 1: Enable the Customer Registration Option
The account login page’s WooCommerce registration forms must first be activated. Check to Enable Customer Registration on the “My Account” tab by going to WooCommerce → Settings → Accounts & Privacy and selecting that option.
Step 2: Add Custom Field in Functions.php File
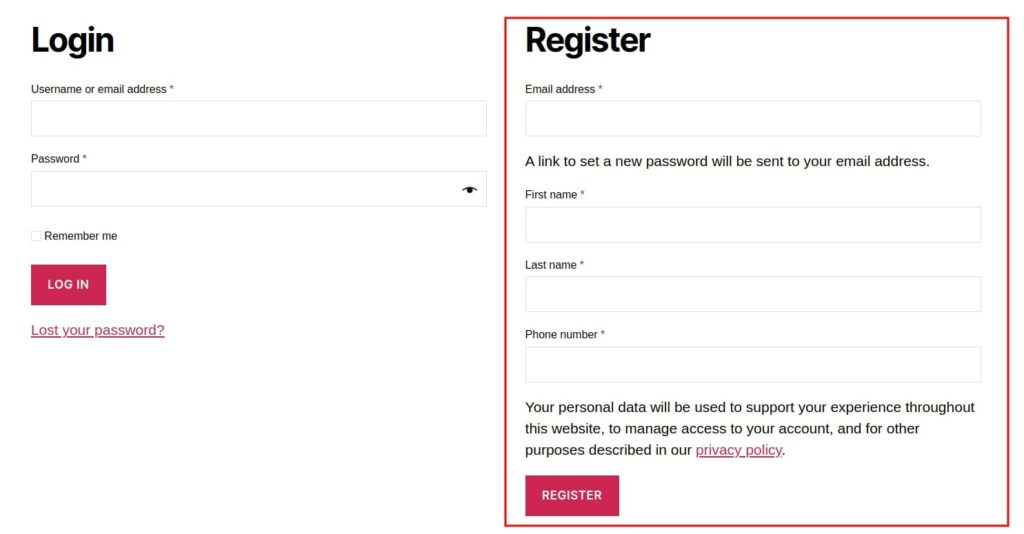
It should be clear that it is a rather basic WooCommerce form. However, by using the subsequent operations, we can expand this structure with more fields.
Include the following lines of code near the end of your functions.php file, which is found in your theme folder, to add more fields like first name, last name, phone number, etc.
<?php
// Cxc Add Custom Fields
add_action( 'woocommerce_register_form', 'cxc_add_register_form_field' );
function cxc_add_register_form_field(){

	woocommerce_form_field(
		'billing_first_name',
		array(
			'type'        => 'text',
            'required'    => true, // just adds an "*"
            'label'       => 'First name'
        ),
		( isset($_POST['billing_first_name']) ? $_POST['billing_first_name'] : '' )
	);

	woocommerce_form_field(
		'billing_last_name',
		array(
			'type'        => 'text',
            'required'    => true, // just adds an "*"
            'label'       => 'Last name'
        ),
		( isset($_POST['billing_last_name']) ? $_POST['billing_last_name'] : '' )
	);

	woocommerce_form_field(
		'billing_phone',
		array(
			'type'        => 'tel',
			'required'    => true, // just adds an "*"
			'label'       => 'Phone number'
		),
		( isset( $_POST[ 'billing_phone' ] ) ? $_POST[ 'billing_phone' ] : '' )
	);

}
?>
Step 3: Validate Registration Form Fields
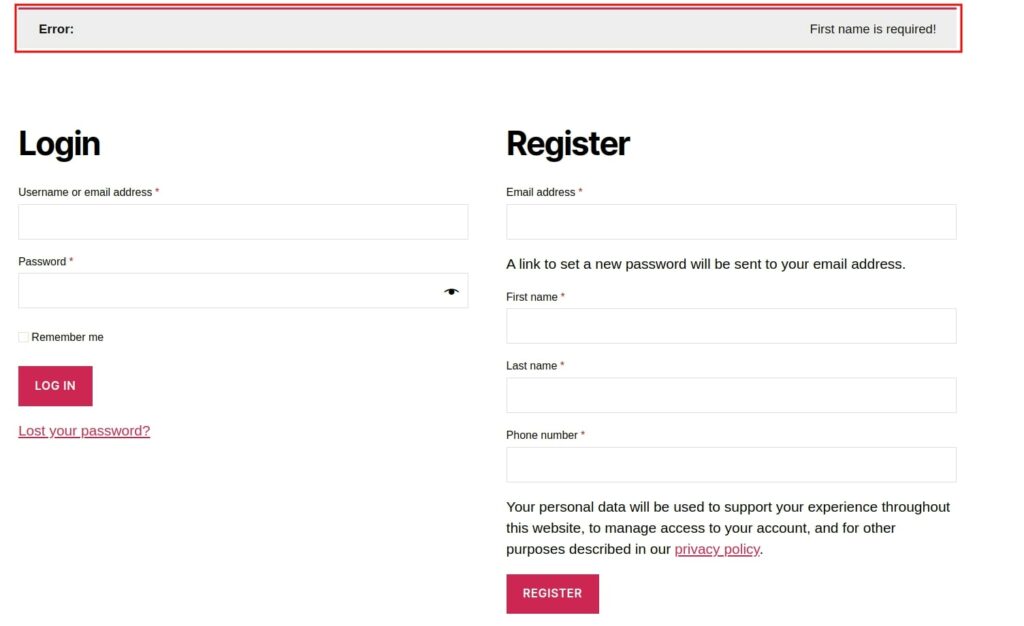
Now that your WooCommerce Registration Form fields have been added, add the following code after the conclusion of the previous function to provide validation to these fields:
<?php
// Cxc validate fields to Register Form
add_action( 'woocommerce_register_post', 'cxc_validate_fields', 10, 3 );
function cxc_validate_fields( $username, $email, $errors ) {

	if ( empty( $_POST['billing_first_name'] ) ) {
		$errors->add( 'billing_first_name_error', 'First name is required!' );
	}

	if ( empty( $_POST['billing_last_name'] ) ) {
		$errors->add( 'billing_last_name_error', 'Last name is required!' );
	}

	if( empty( $_POST[ 'billing_phone' ] ) ) {
		$errors->add( 'phone_number_error', 'We really want to know!' );
	}

}
?>
Step 4: Save Registration Form Fields
To save the data from these custom fields, you must first add it to the database. Add the following code after the preceding function’s conclusion to do this:
<?php
// Cxc save fields to database
add_action( 'woocommerce_created_customer', 'cxc_save_register_fields' );
function cxc_save_register_fields( $customer_id ){

	if ( isset( $_POST['billing_first_name'] ) ) {
        //First name field which is by default
		update_user_meta( $customer_id, 'first_name', sanitize_text_field( $_POST['billing_first_name'] ) );
        // First name field which is used in WooCommerce
		update_user_meta( $customer_id, 'billing_first_name', sanitize_text_field( $_POST['billing_first_name'] ) );
	}
	if ( isset( $_POST['billing_last_name'] ) ) {
        // Last name field which is by default
		update_user_meta( $customer_id, 'last_name', sanitize_text_field( $_POST['billing_last_name'] ) );
        // Last name field which is used in WooCommerce
		update_user_meta( $customer_id, 'billing_last_name', sanitize_text_field( $_POST['billing_last_name'] ) );
	}

	if ( isset( $_POST[ 'billing_phone' ] ) ) {
		update_user_meta( $customer_id, 'billing_phone', sanitize_text_field( $_POST[ 'billing_phone' ] ) );
	}

}
?>
After that, simply click the Update File button at the bottom of the Editor. It’s time to check if the data from the custom fields are being stored in the database. To verify it, first, create an account and then go to your billing address.
Frequently Asked Question
How do you add more fields to the form?
Using the Field List pane, you may add a field to a form or report. Open your report in either Layout or Design mode.
In WooCommerce, how can I separate the login and registration pages?
Follow these steps to separate the Login and Registration pages in WooCommerce: Install the WooCommerce Separate Login and Registration Pages plugin and activate it. Go to Accounts » Settings in your WordPress admin panel.
How to add Custom Meta Fields in Category WordPress?
follow these steps to Add Custom Meta Fields in Category WordPress. Click Here.